
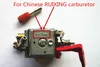
Effortless Carburetor Adjustment: The Ultimate Home & Garden Tool for Wacker Neuson BH22, BH23, BH24, and BH55 Breakers
Carburetor adjustment is an essential process that ensures the proper functioning of equipment such as lawnmowers, chainsaws, and generators. A carburetor needs to be adjusted because it affects the air and fuel mixture, which could lead to poor engine performance or harm to the engine if not set up correctly. Thankfully, there’s a product available that can effortlessly adjust the carburetor on these breakers with ease: the carb adjustment tool. This convenient home and garden tool come equipped with easy-to-use features that make adjusting your carburetor a breeze. To use the tool, start by locating the adjustment screws, then follow our detailed step-by-step guide to achieve the best results. With this handy tool, you’ll be able to keep your equipment running smoothly for years to come.


Understanding Carburetor Adjustment
In simple terms, a carburetor is a mechanical device that mixes air and fuel in a specific ratio for combustion. The carburetor’s adjustment controls the amount of air and fuel that enters the engine, which determines the engine’s performance. A well-adjusted carburetor ensures that the engine gets the right amount of fuel for efficient performance.
Why is carburetor adjustment necessary? Over time, factors such as wear and tear, temperature changes, and altitude can affect the proper functioning of a carburetor. If the carburetor is not adjusted correctly, the engine’s performance will suffer, leading to several problems such as rough idling, stalling, decreased fuel efficiency, poor acceleration, and reduced power output.
Carburetor adjustment can be done manually or electronically depending on the type of engine and carburetor used. In a manual carburetor adjustment, the technician adjusts the carburetor screws to control the air-fuel mixture. Electronic carburetor adjustments rely on computerized sensors that monitor the engine’s performance to make necessary adjustments automatically.
It’s essential to note that carburetor adjustment is not a one-size-fits-all process. There are different types of carburetors, each requiring specific adjustment techniques. Therefore, it’s crucial to consult your equipment’s manufacturer recommendations when adjusting the carburetor.
The Ultimate Home & Garden Tool
One of the standout features of this tool is its ease of use. Unlike traditional methods of carburetor adjustment which require multiple tools and a lot of guesswork, the carb adjustment tool is a simple, one-piece device. It fits easily into your hand and can be used with just one finger. This makes it perfect for both professionals and DIY enthusiasts alike.
In addition to being easy to use, the carb adjustment tool also boasts impressive accuracy. Its precise calibration ensures that you’ll get the exact carburetor setting you need every time. This means less time spent tinkering with your tools and more time actually using them. Plus, the carb adjustment tool works with a wide range of carburetor types, making it a versatile addition to your toolkit.
But what really sets the carb adjustment tool apart is its impact on the health and longevity of your garden tools. A properly adjusted carburetor can reduce emissions, improve fuel efficiency, and ultimately extend the life of your equipment. By investing in a carb adjustment tool, you’re not only making your own life easier, but also doing your part to protect the environment and save money in the long run.
Step-by-Step Guide to Using the Tool
Step 1: Understand Your Carb Adjustment Tool
Before using a carb adjustment tool, it’s essential to understand its basic features. There are different types of carb adjustment tools available in the market today, such as screwdrivers or specialized devices like the Carburetor Adjusting Tool Kit. Familiarize yourself with the tool’s functions, including how it attaches to the carburetor and how it adjusts the mixture.
Step 2: Locate the Carburetor
Once you have a clear understanding of the tool, locate the carburetor on your engine. Most carburetors are located under the hood of the vehicle or near the engine. You may need to remove the air cleaner to access the carburetor. Refer to your vehicle owner’s manual for precise instructions.
Step 3: Turn Off the Engine
For safety reasons, turn off the car engine before attempting any adjustments.
Step 4: Identify the Adjusting Screws
There are typically two adjusting screws on the carburetor. The idle screw controls the idle speed of the engine, while the mixture screw controls the air-fuel ratio. The mixture screw is usually located on the side of the carburetor, marked with an ‘M’ or ‘L’.
Step 5: Adjust the Idle Screw
Start by adjusting the idle screw, which affects the engine’s idle speed. Use your carb adjustment tool to turn the idle screw clockwise to increase the idle speed or counterclockwise to decrease it. Keep turning until you achieve the desired RPM.
Step 6: Adjust the Mixture Screw
Next, adjust the mixture screw to optimize the air-fuel ratio. Start by turning the screw clockwise until it is fully seated. Turn the screw counterclockwise one and a half turns and start the engine. Let it warm up for a few minutes before adjusting the screw further. Use the carb adjustment tool to turn the screw slowly clockwise or counterclockwise until you achieve the highest RPM.
Step 7: Tips and Tricks
There are some tips and tricks to keep in mind when using carb adjustment tools. Firstly, avoid over-tightening the screws, as this could damage the carburetor. Secondly, make sure you are making small adjustments at a time and test the engine after each adjustment. Lastly, always follow the manufacturer’s instructions for your specific carb adjustment tool.
In conclusion, using a carb adjustment tool can be a simple and effective way to improve the performance of your engine. By following the step-by-step guide outlined above, you’ll be able to adjust your carburetor with ease. Remember to exercise caution and refer to the manufacturer’s instructions, and your engine will run efficiently and smoothly.
FAQ
Q1. What is the Effortless Carburetor Adjustment tool and why is it important for Wacker Neuson BH Breakers?
The Effortless Carburetor Adjustment tool is a device that allows for easy adjustment of the carburetor on Wacker Neuson BH22, BH23, BH24, and BH55 Breakers. It is important because proper carburetor adjustment ensures that the machine runs efficiently and effectively, reducing fuel consumption and preventing damage to the engine.
Q2. How does the Effortless Carburetor Adjustment tool work?
The Effortless Carburetor Adjustment tool works by attaching to the carburetor adjustment screw and allowing for precise adjustments without the need for special tools or knowledge. The device is designed to fit snugly and securely onto the adjustment screw while allowing for easy and accurate adjustments with minimal effort.
Q3. Can the Effortless Carburetor Adjustment tool be used on other types of breakers or equipment?
While the Effortless Carburetor Adjustment tool is specifically designed for use with Wacker Neuson BH Breakers, it may work with other types of equipment that have similar carburetor adjustment screws. However, it is important to refer to the manufacturer’s instructions and specifications before attempting to use the tool on any other equipment.
Q4. Is the Effortless Carburetor Adjustment tool easy to use and maintain?
Yes, the Effortless Carburetor Adjustment tool is designed to be user-friendly and requires minimal maintenance. Simply attach the tool to the carburetor adjustment screw and make the necessary adjustments. The tool can be easily cleaned and stored when not in use. However, it is important to follow all safety guidelines and the manufacturer’s instructions to ensure proper use and maintenance of the tool.


