
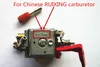
Effortlessly Adjust Your Carburetor with the RUIXING Home & Garden Tool: Perfect for Wacker Neuson BH22, BH23, BH24, and BH55 Breakers!
Attention carb adjustment tool consumers! Discover the benefits of the RUIXING Home & Garden Tool for easy, affordable, and effective carburetor adjustments. Our step-by-step guide provides detailed instructions for optimal results, including key steps and precautions to take. Plus, learn maintenance tips to ensure long-lasting use and durability, with cleaning and storage recommendations. Don’t miss out on this must-have tool for hassle-free carburetor adjustments!


Benefits of using RUIXING Home & Garden Tool
One of the primary advantages of using the RUIXING Home & Garden Tool is its ease of use. Traditional carburetor adjustment tools can be complicated and require technical expertise to operate effectively. In contrast, the RUIXING tool is designed with the average consumer in mind, featuring intuitive controls and straightforward instructions. This makes it easy for anyone, regardless of their experience level, to make precise adjustments to their carburetor without the need for professional assistance.
In addition to its ease of use, the RUIXING Home & Garden Tool is also highly affordable, making it a cost-effective solution for consumers. Professional carburetor adjustment services can be expensive, and purchasing specialized tools for this task can also add up. The RUIXING tool offers a budget-friendly alternative, allowing consumers to save money by performing carburetor adjustments themselves, rather than relying on costly professional services.
Furthermore, the RUIXING Home & Garden Tool is highly effective in adjusting carburetors, providing reliable results that contribute to improved engine performance. Precise carburetor adjustment is essential for optimizing fuel efficiency and reducing emissions, and the RUIXING tool enables users to achieve these goals with confidence. By investing in this tool, consumers can ensure that their outdoor power equipment operates at its best, saving money on fuel costs and minimizing their environmental impact.
Step-by-Step Guide
In this article, we will provide you with a step-by-step guide on how to use the carb adjustment tool effectively, ensuring optimal results.
Step 1: Preparation
Before starting the carb adjustment process, it is crucial to prepare adequately. Ensure that your vehicle is parked on a flat surface and that the engine is turned off. Afterward, detach the air cleaner cover and filter from your carburetor to expose the carburetor’s throat.
Step 2: Identifying the Adjustment Screws
The next step is to locate the carburetor adjustment screws. Typically, most carburetors have two screws – an idle speed screw and an idle mixture screw. The idle speed screw controls the throttle opening while the idle mixture screw regulates the fuel-air ratio at idle speed. It is essential to identify these screws to adjust them correctly.
Step 3: Using the Carb Adjustment Tool
Using a carb adjustment tool, insert it into the idle speed screw and turn it clockwise or anti-clockwise to adjust the throttle opening. Similarly, insert the tool into the idle mixture screw and turn it clockwise or anti-clockwise to adjust the fuel-air ratio at idle speed. Make sure to turn the screws gradually until you achieve the desired setting.
Step 4: Precautions
While using the carb adjustment tool, it is essential to take necessary precautions to avoid any mishaps. Always read the manufacturer’s instructions before using the tool to understand its proper usage. Moreover, wear protective gear such as gloves and goggles to protect yourself from any debris that may fly during the adjustment process.
Step 5: Testing
After adjusting the carburetor using the carb adjustment tool, it is crucial to test your vehicle’s performance. Start the engine and let it idle for some time to allow the new settings to stabilize. Afterward, take your vehicle for a test drive to determine if the adjustments have resulted in the desired performance and efficiency.
Maintenance tips
As a carb adjustment tool consumer, you know the importance of having this essential tool in your garage or workshop. It helps you keep your engine running smoothly and efficiently, ensuring that your car, motorcycle, or other vehicle is performing at its best. But just like any other tool, it requires proper maintenance to ensure it lasts for many years to come. In this article, we’ll provide you with some tips on how to properly maintain your carb adjustment tool so you can continue to get the most out of it.
The Importance of Proper Maintenance
Before we dive into the specific maintenance tips, let’s first talk about why it’s so important to take care of your carb adjustment tool. As with any tool, neglecting maintenance can lead to a variety of issues down the line. Over time, dust, dirt, and debris can build up in and around your tool, causing it to malfunction or break down entirely. Proper maintenance helps prevent these issues from occurring, keeping your tool in top shape and ready to use whenever you need it.
Cleaning Your Carb Adjustment Tool
One of the most important maintenance tasks you can do for your carb adjustment tool is to clean it regularly. This not only helps prevent the buildup of dirt and debris but also ensures that your tool is functioning correctly. Here’s what you need to do:
1. Disconnect your tool from any power sources and remove any attachments.
2. Use a soft-bristled brush to gently scrub away any loose dirt or debris from the surface of your tool.
3. Use a damp cloth to wipe down the tool, being careful not to get any water inside.
4. If there are any stubborn stains or marks, try using a mild cleaner or degreaser to remove them.
5. Finally, dry your tool thoroughly with a clean cloth before storing it.
Storing Your Carb Adjustment Tool
Another crucial aspect of maintaining your carb adjustment tool is proper storage. Storing your tool incorrectly can cause it to become damaged or malfunction, rendering it unusable. Here are some tips on how to store your tool correctly:
1. Store your tool in a clean, dry area where it won’t be exposed to moisture or extreme temperatures.
2. Keep it out of direct sunlight, as this can cause the plastic to warp or discolor.
3. If your tool came with a protective case or cover, use it to protect it from dust and debris.
4. Don’t store your tool near any chemicals or solvents that could damage the plastic or rubber components.
In conclusion, proper maintenance is essential for keeping your carb adjustment tool in top shape. Regular cleaning and proper storage will help prevent malfunctions and prolong the lifespan of your tool. By following these simple tips, you’ll be able to make the most out of your tool for years to come.
FAQ
Q: What is a carburetor, and why is it important to adjust it?
A: A carburetor is a device that mixes air and fuel in the proper ratio for combustion in an internal combustion engine. Ensuring that your carburetor is correctly adjusted is vital to the performance of your machine. An incorrect mixture can lead to decreased power output, poor fuel economy, and even engine damage.
Q: How does the RUIXING Home & Garden Tool assist in adjusting my carburetor?
A: The RUIXING Home & Garden Tool is specifically designed to assist in the adjustment of carburetors on Wacker Neuson BH22, BH23, BH24, and BH55 breakers. It provides a simple and effortless way to fine-tune the air and fuel mixture to achieve optimal performance from your machine.
Q: Is the RUIXING Home & Garden Tool easy to use?
A: Yes, the RUIXING Home & Garden Tool is straightforward to use. Simply attach the tool to the carburetor with the provided adapter, and then adjust the screw until you reach the desired air-fuel ratio. There’s no need for any complicated tools or technical knowledge.
Q: Can the RUIXING Home & Garden Tool be used on other machines besides Wacker Neuson BH breakers?
A: Unfortunately, no. The RUIXING Home & Garden Tool is specifically designed for use with Wacker Neuson BH22, BH23, BH24, and BH55 breakers. Attempting to use it on other machines may result in incorrect adjustments or damage to your carburetor.


